
Before you can add a Secondary User, you will have to add a Seat for that user to fill.
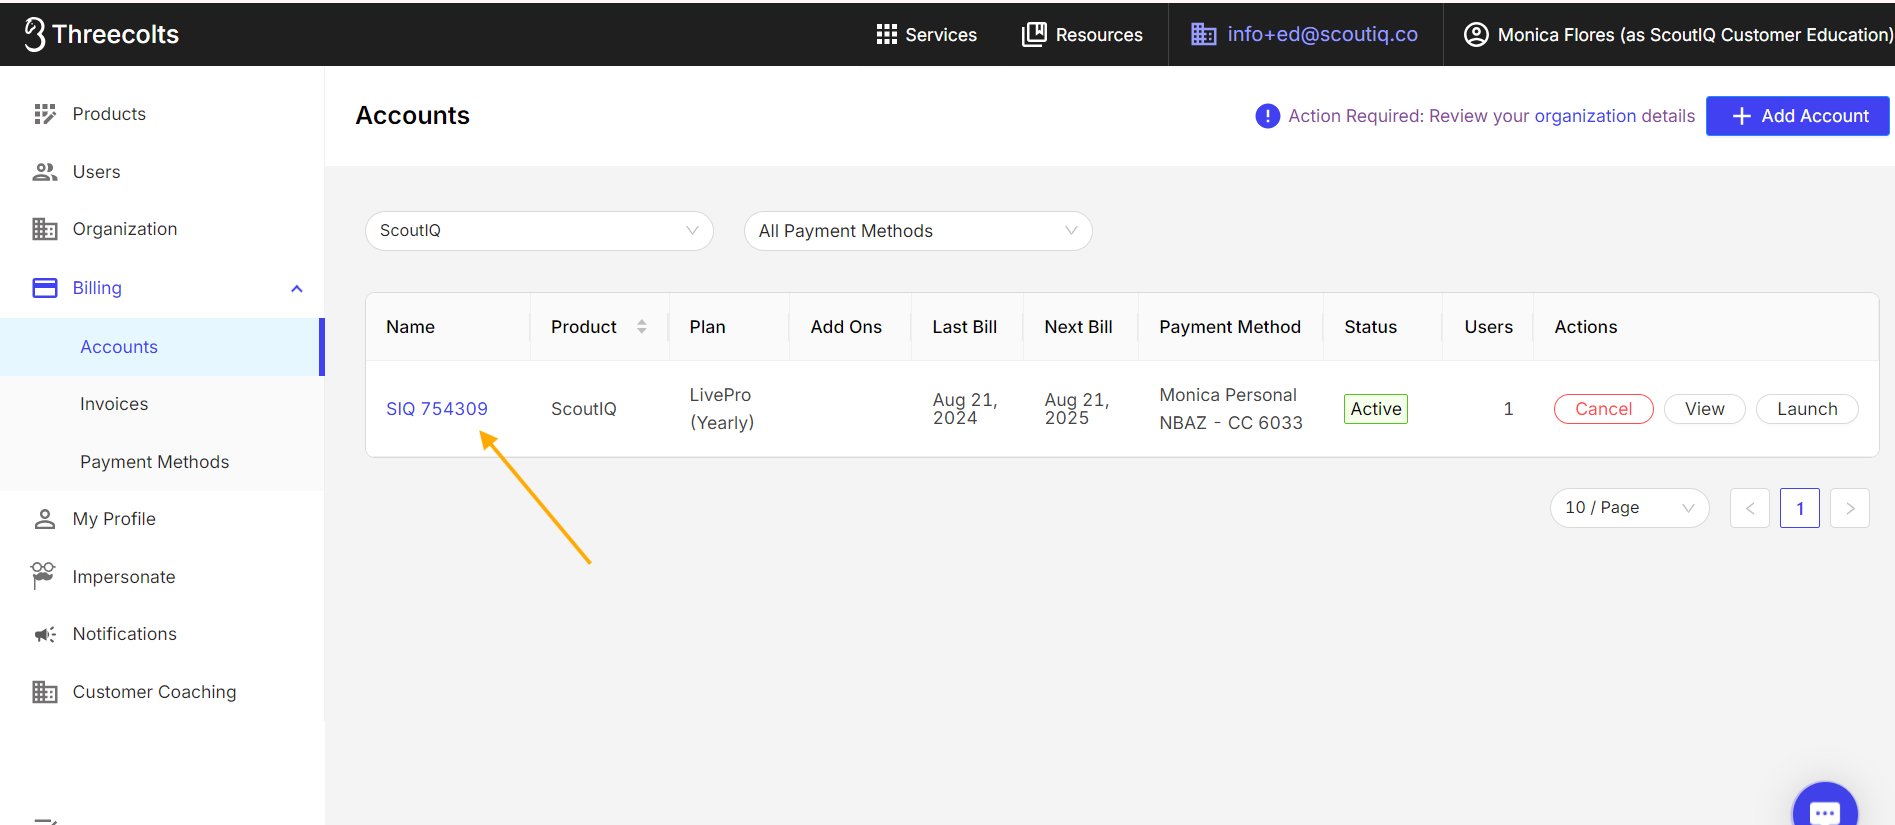
1. Login at manager.threecolts.com and click Billing, then Accounts and select your ScoutIQ Account in Blue:
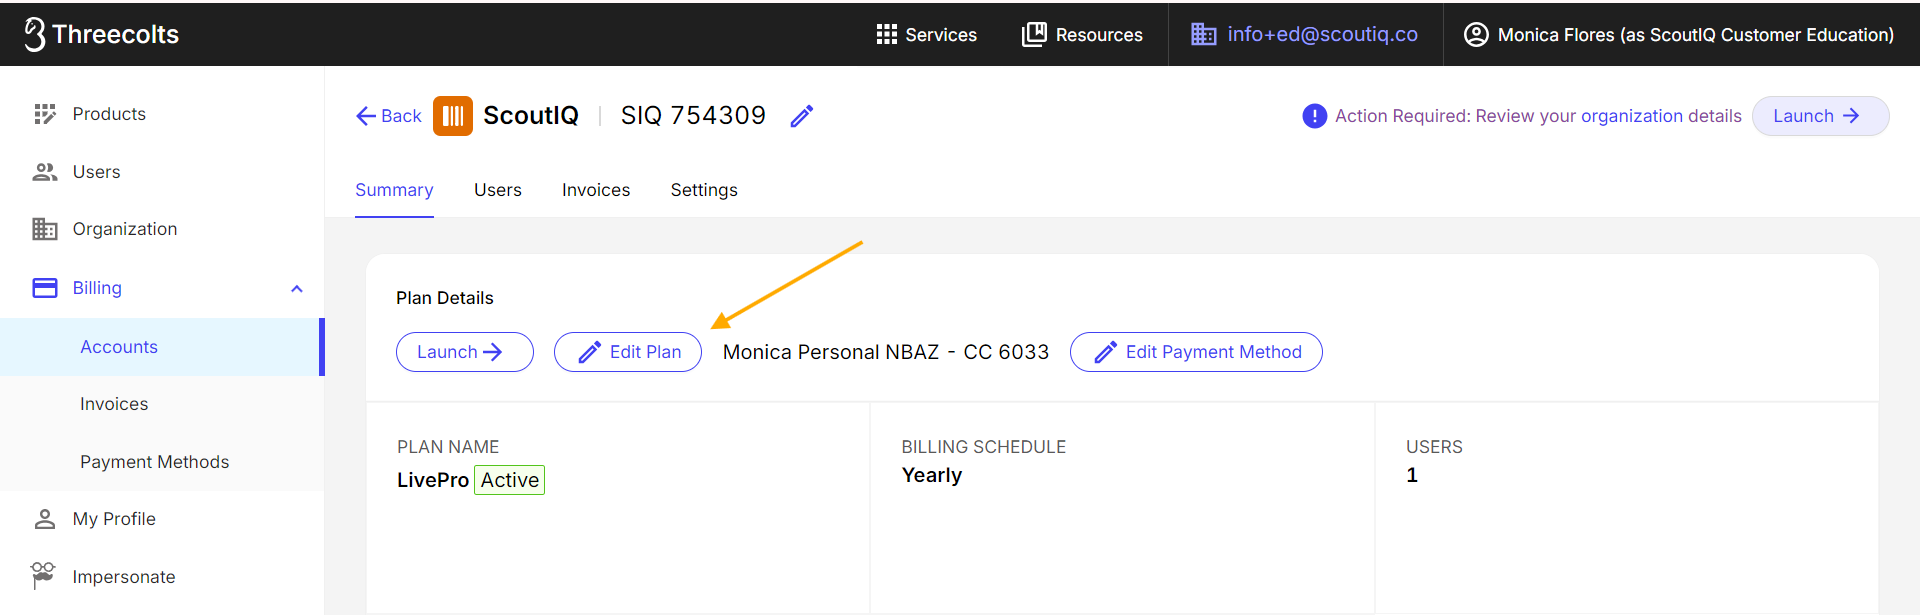
2. Now click the Blue Edit Plan button:
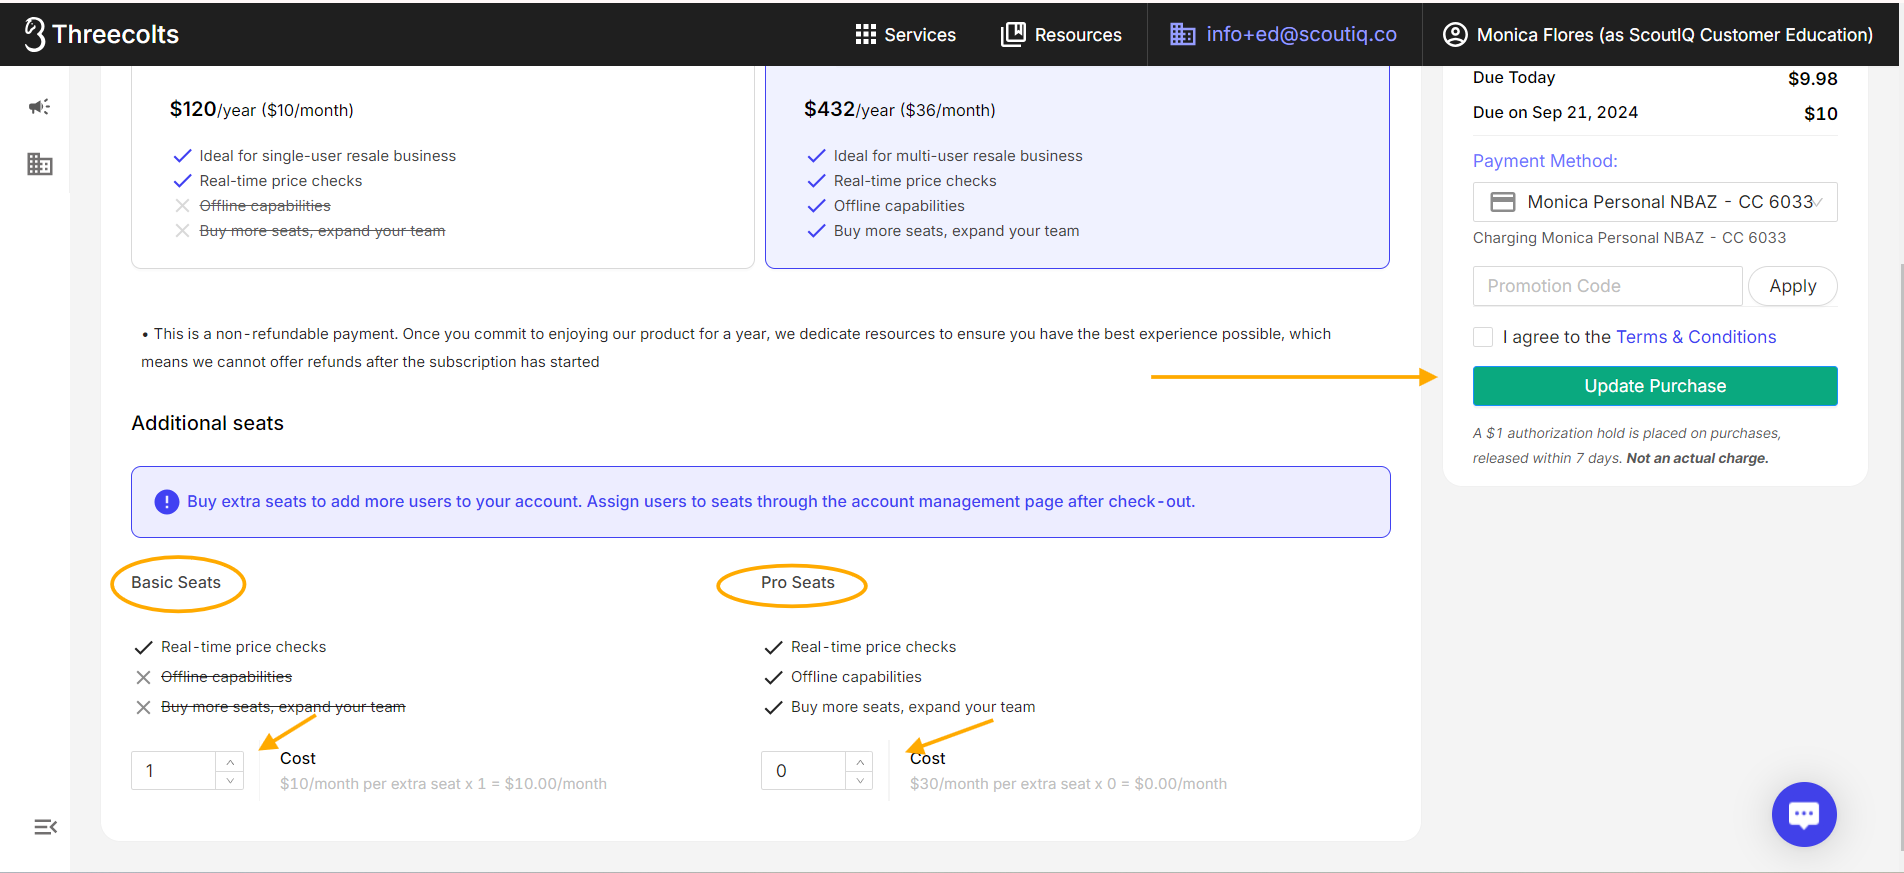
3. Now you will be adding a Seat for your new User.
You can choose to add either Basic seats for $10/month or Pro seats for $30/month. Only Pro seats come with our downloadable database, giving you offline scanning capabilities.
Add a seat for each user want to add at this time using the arrows, then click the Green Update Purchase button:
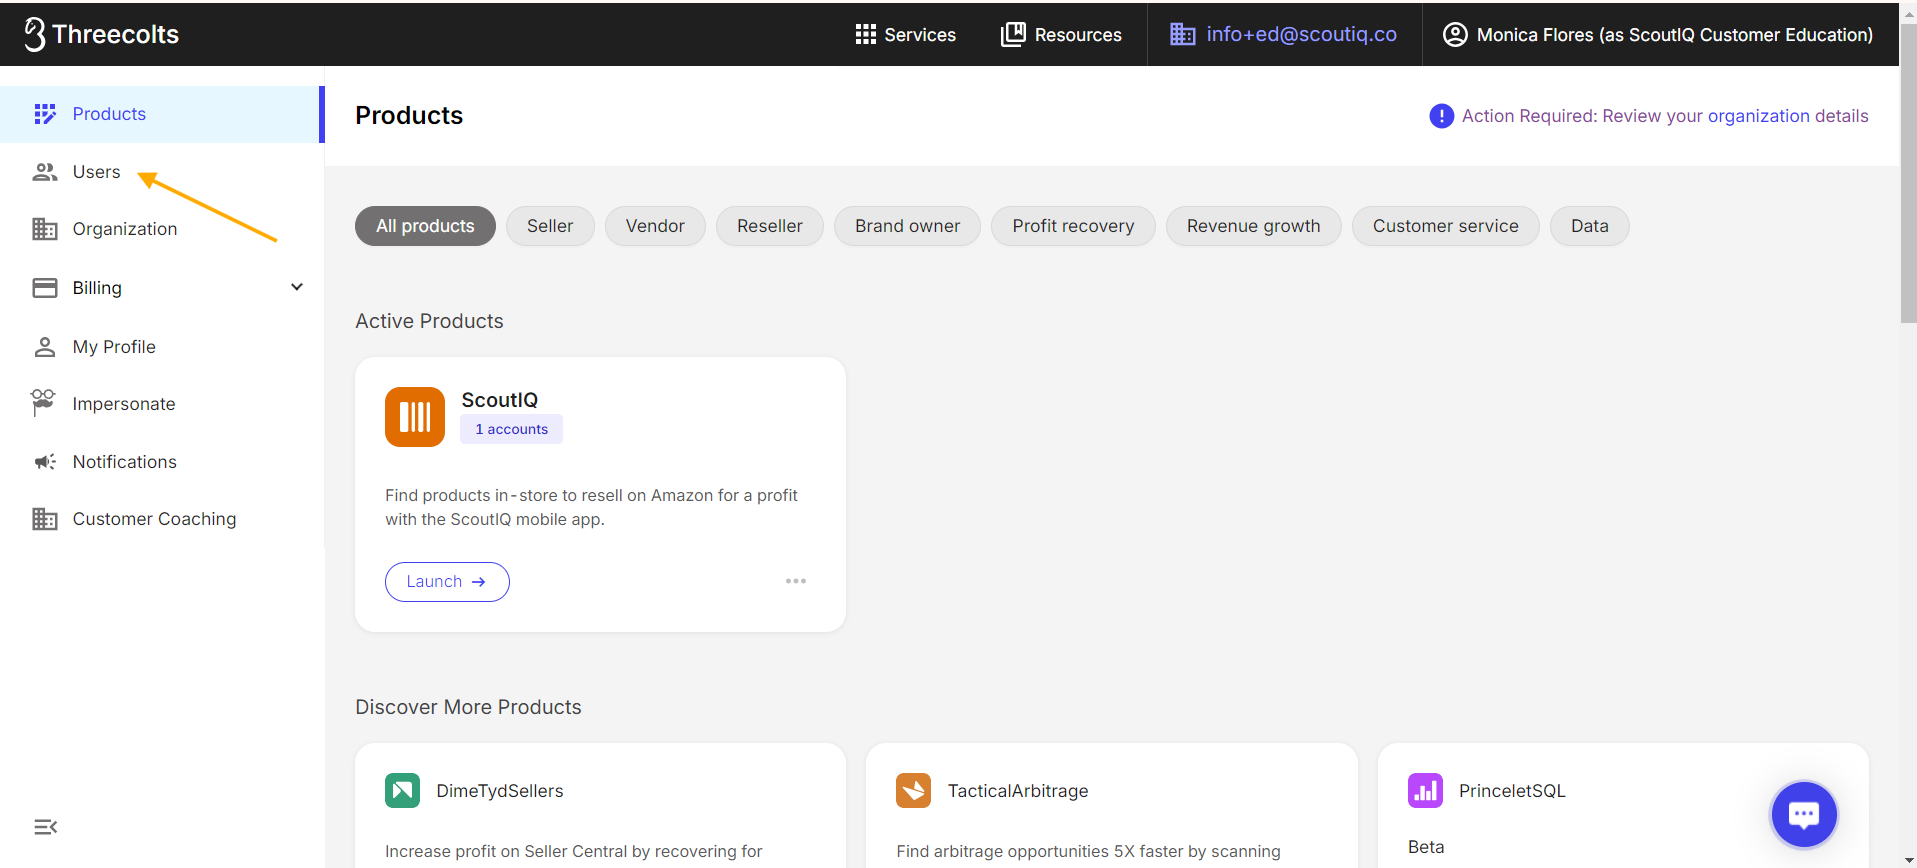
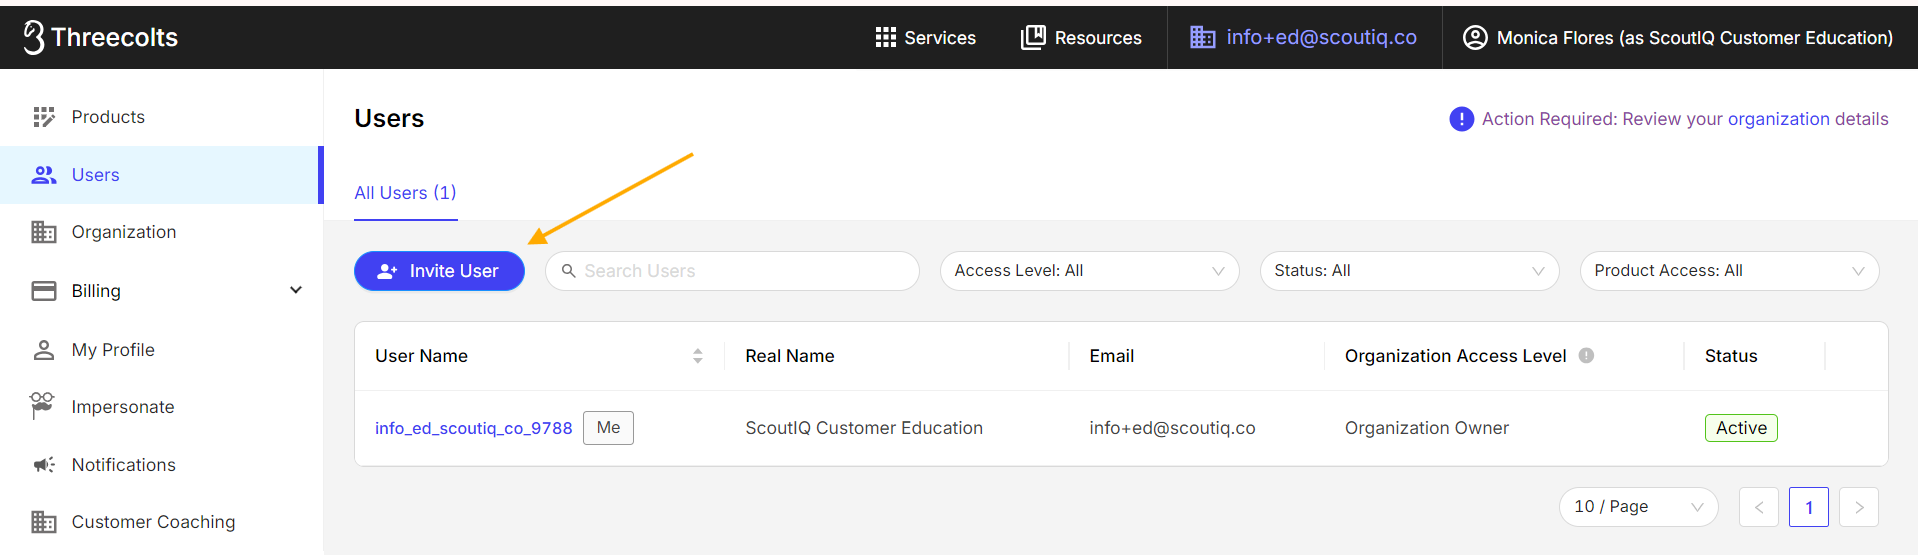
4. Once your purchase is complete, go Users on the left menu:
5. A new page will open, on that page, click the Blue Invite Users button:
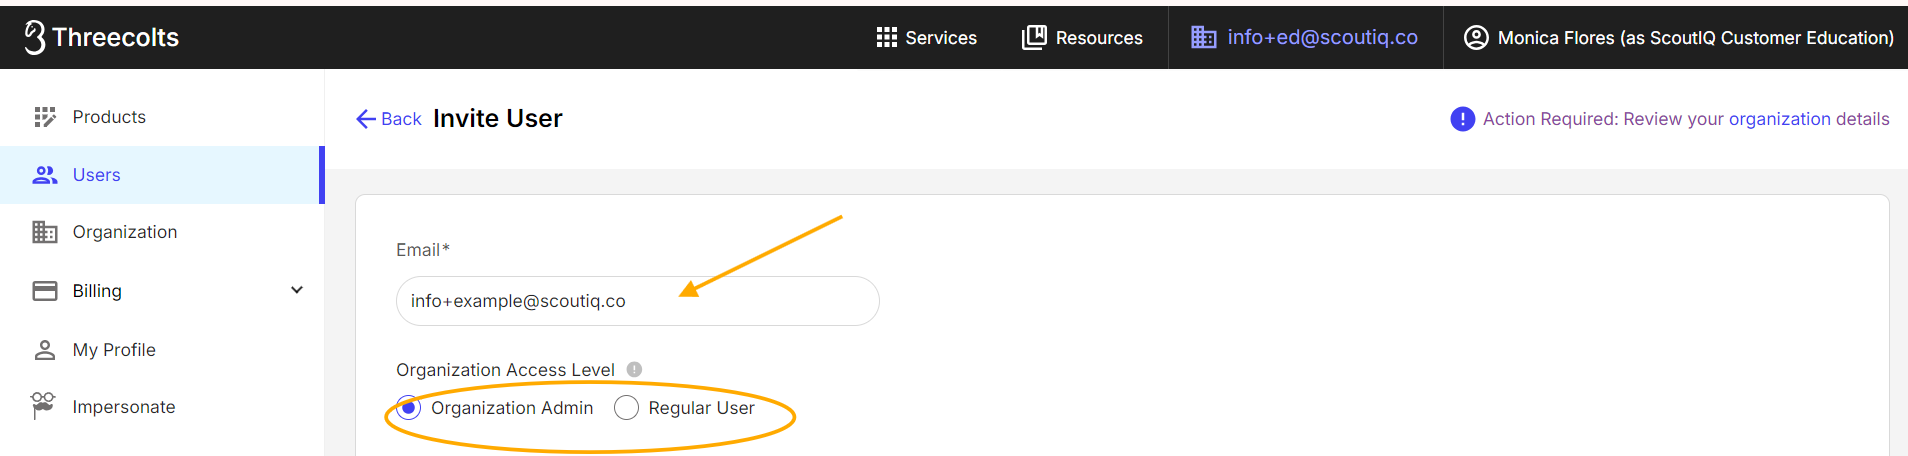
6. Enter the email address of the person you'd like to add and designate them as an Organizational Admin or Regular User:
> An Organization Admin will have access to everything in the Organization. This includes the ability to purchase more accounts, manage users, change/view billing details, etc.
> A Regular User will only have access to the accounts specified and will not have access to anything else associated with the Organization.
Tip: Unless you want your team member to have full account access to your account, we'd recommend adding them as a Regular User rather than an Organization Admin:
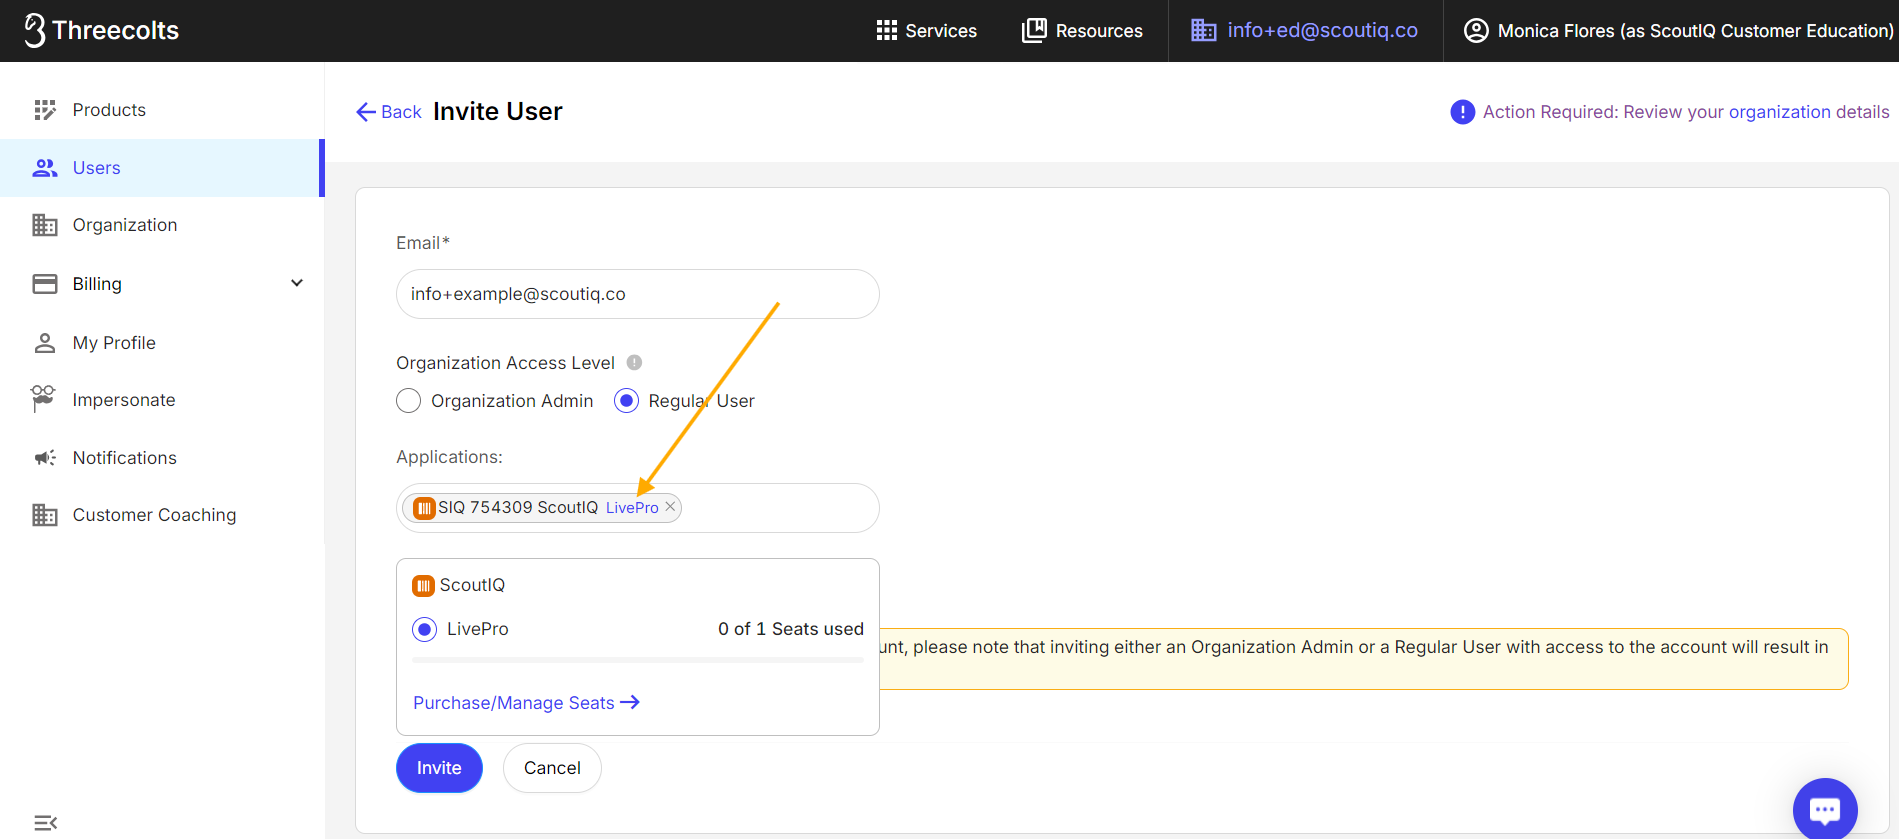
7. Next, under Applications, select your ScoutIQ Account and click the Blue Invite button:
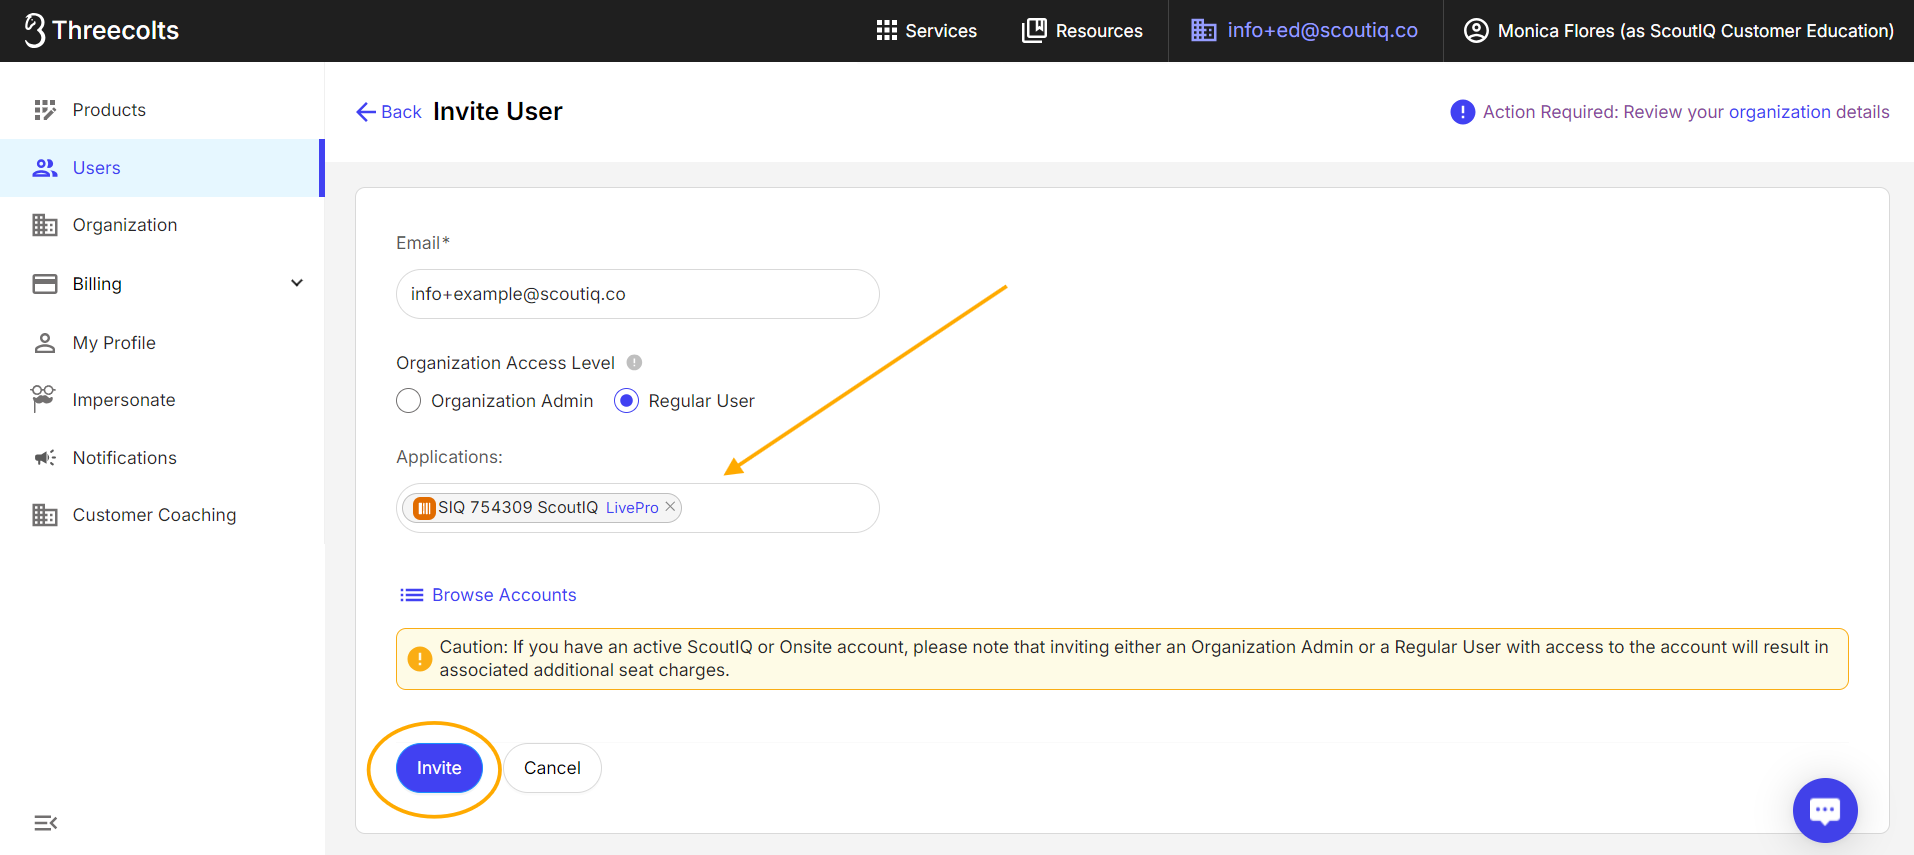
Tip: You can also click the Blue link next to your account noting LivePro or Basic to modify your Seats:
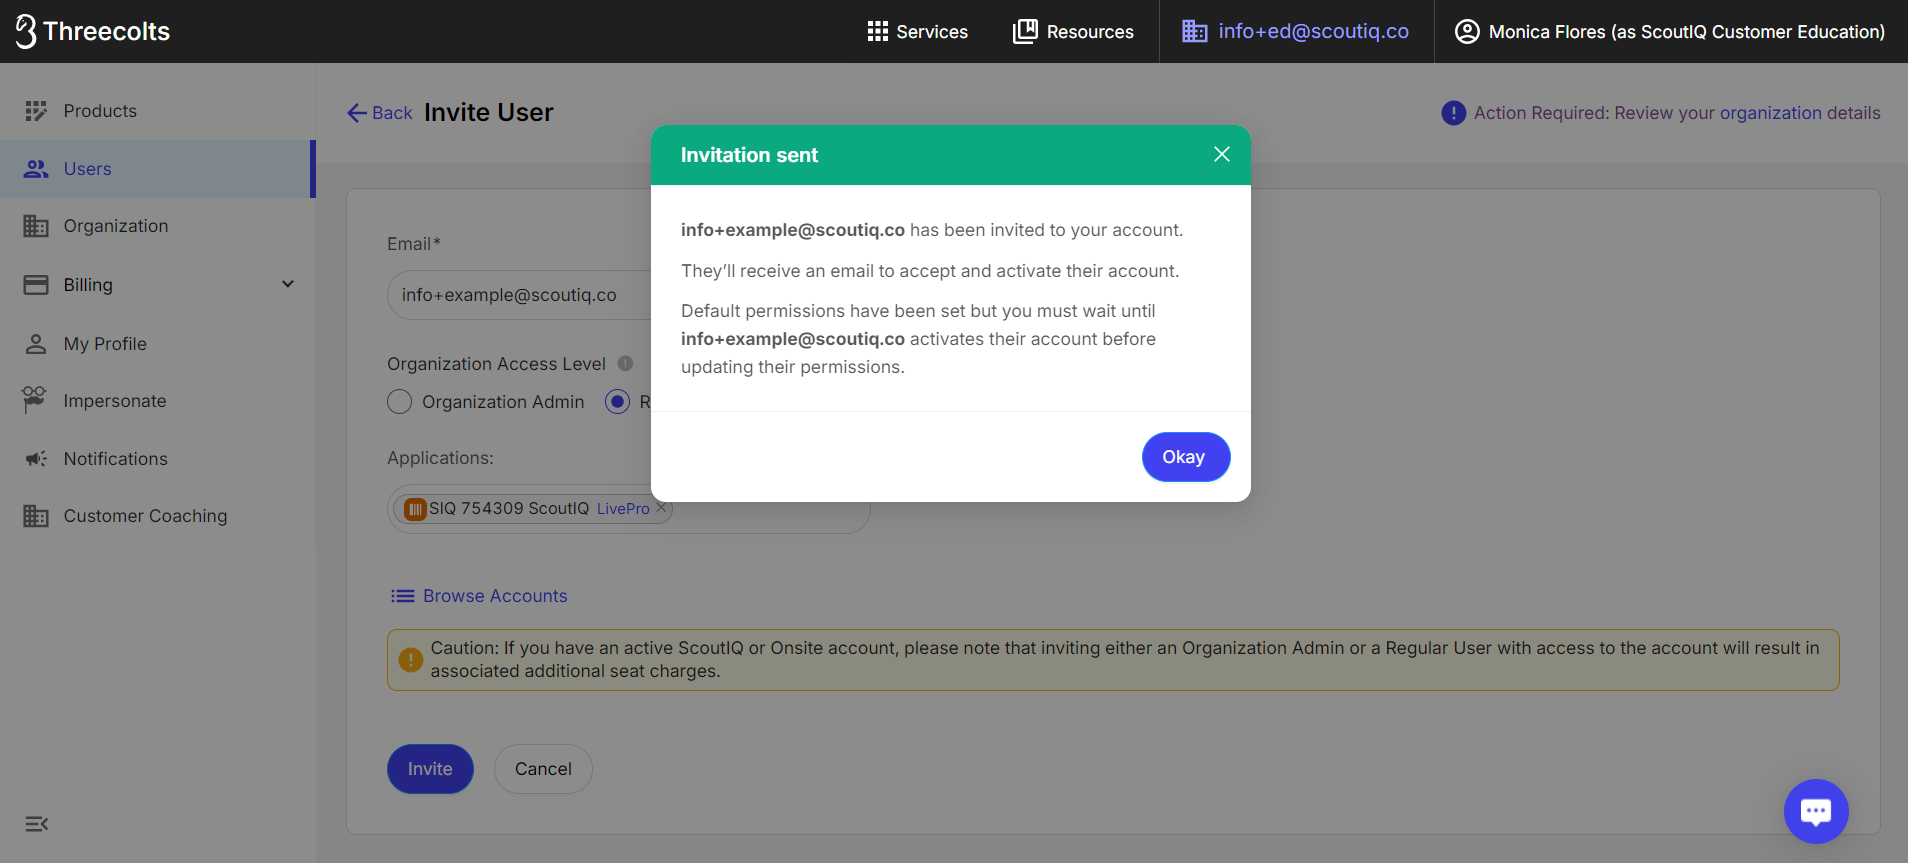
This will bring a confirmation that they have been given default permissions, click the Blue "Okay" button:
8. Your team member will then receive an email inviting them to be a user of your account. Please note that all costs associated with adding a team member will apply at this time.
Please proceed slowly and completely read through this step, if you are adding a team member real-time. The second part of this step is critical.
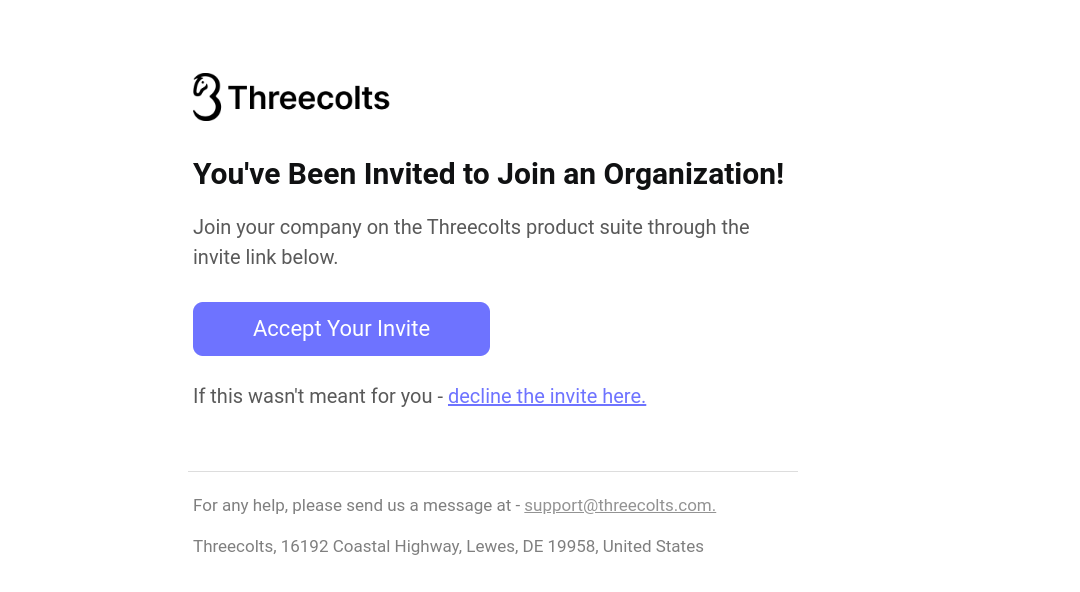
Important: After accepting, they will see a “Thank you screen”, it is critical that you advise them not to close this screen because a second page will load prompting them to create a Threecolts Account. This step is critical as it is when they create their login credentials.
They will then have to confirm their email address again via email:

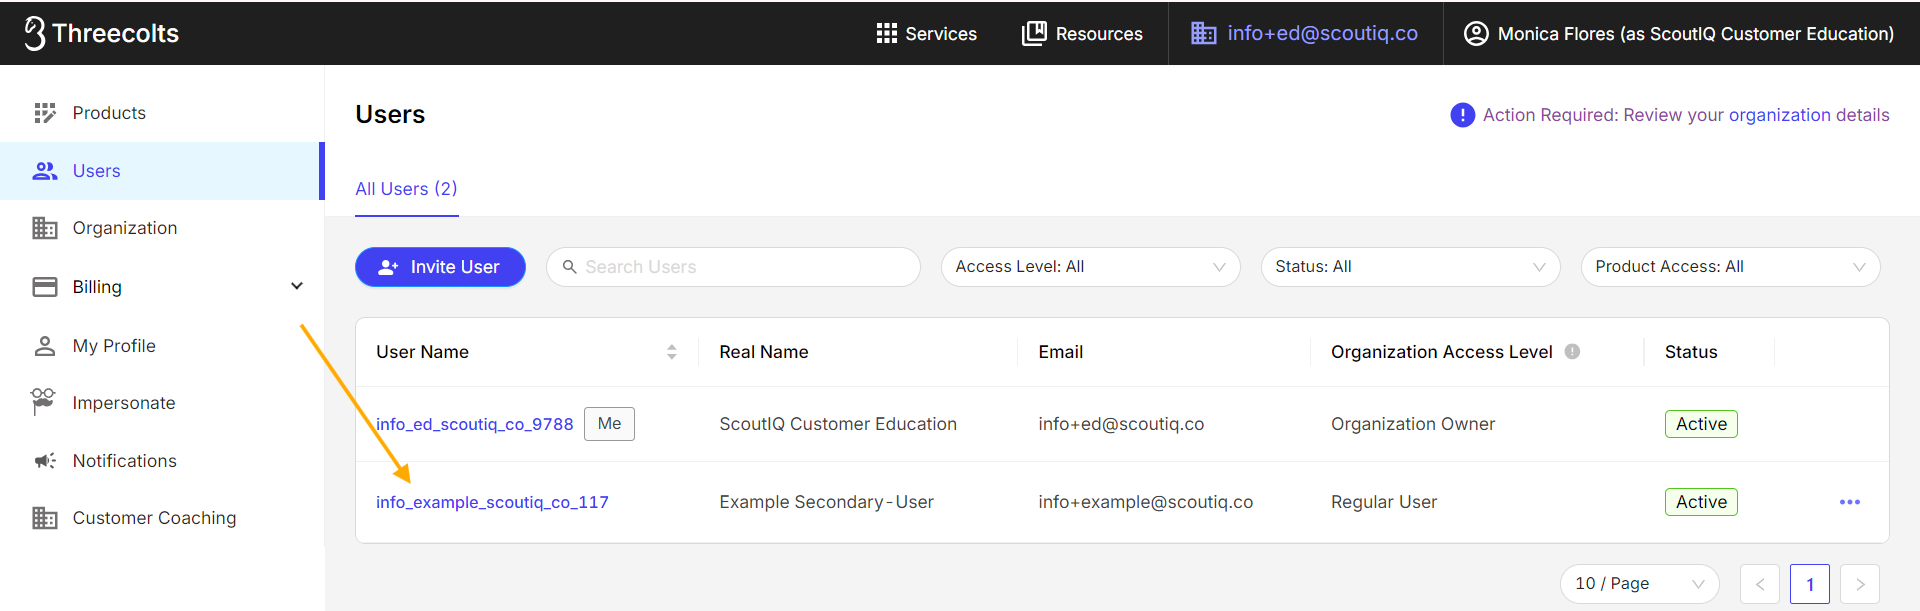
9. Once they have completed the steps from Step 8, if you refresh your screen, you will see the status of their invitation change from Pending to Active. Now, click their Blue User Name on their account:
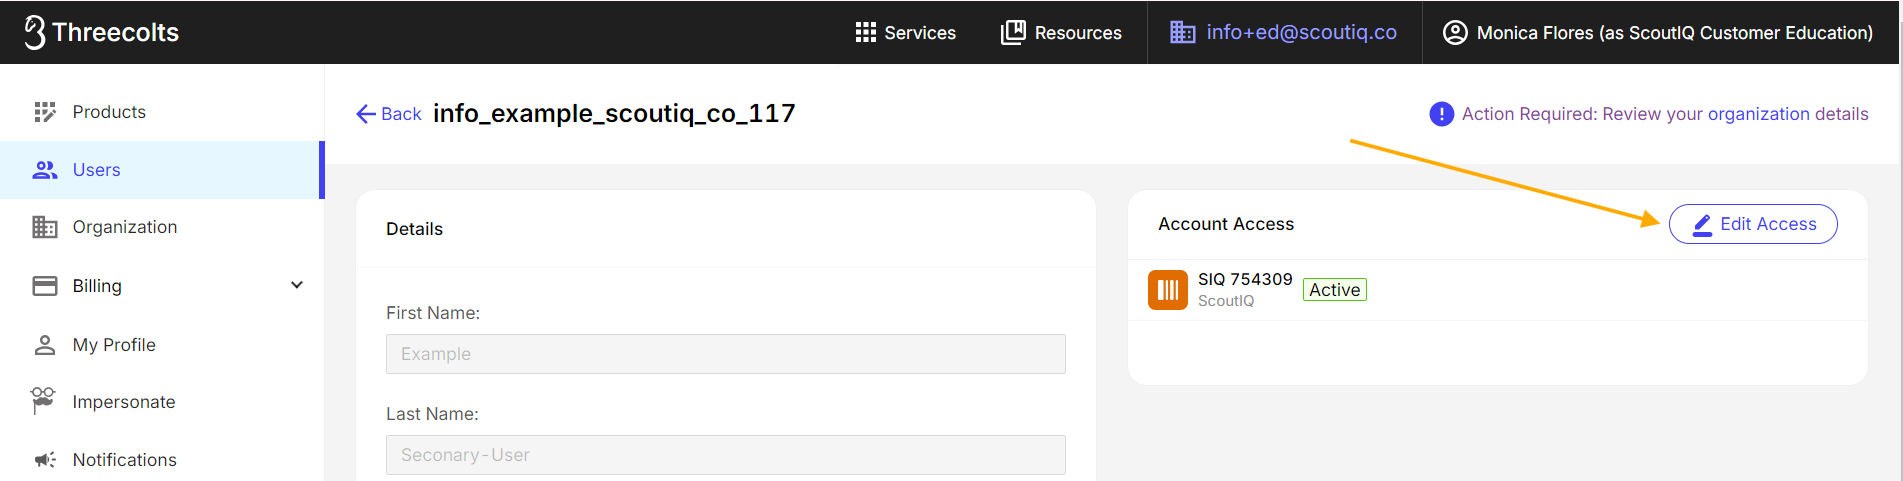
10. Click the Blue Edit Access button:
11. Now you will be providing Access to the Threecolts products of your choice, in this case, ScoutIQ. Click the Blue drop-down arrow under Options, and select the seat you want them to fill. Then click the Blue Apply User to # Accounts button.
Note: If you are subscribed to more than one product you can use the Gray drop-down arrow next to All Products to select which products you want to add this user for: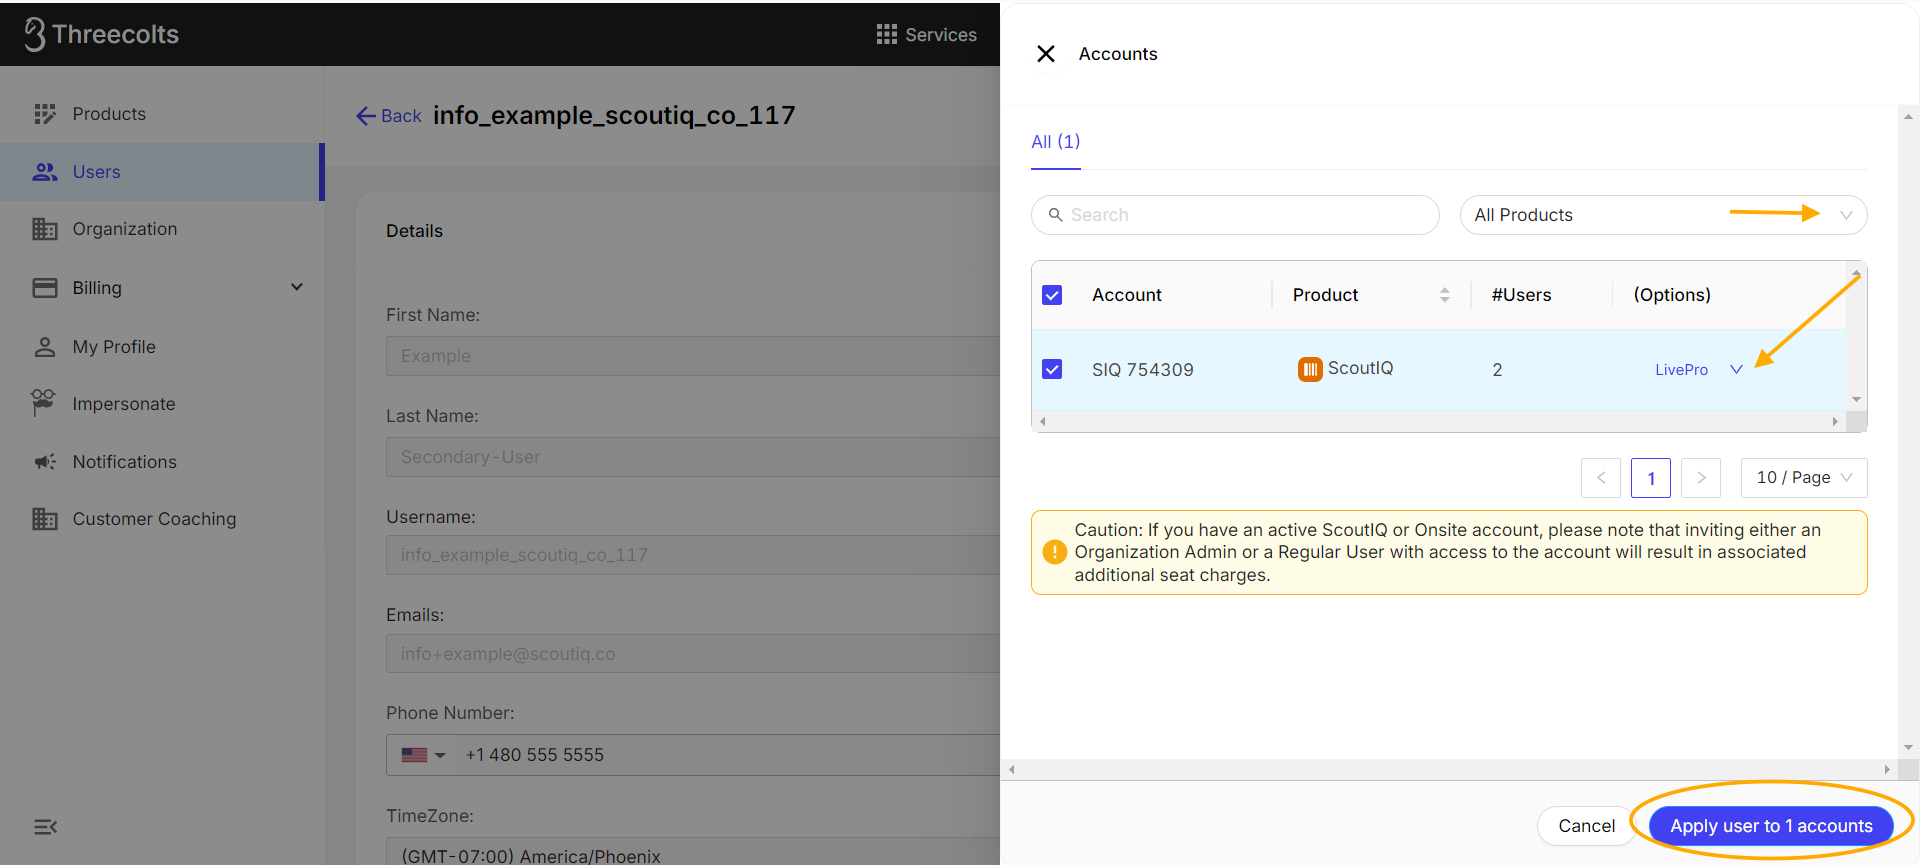
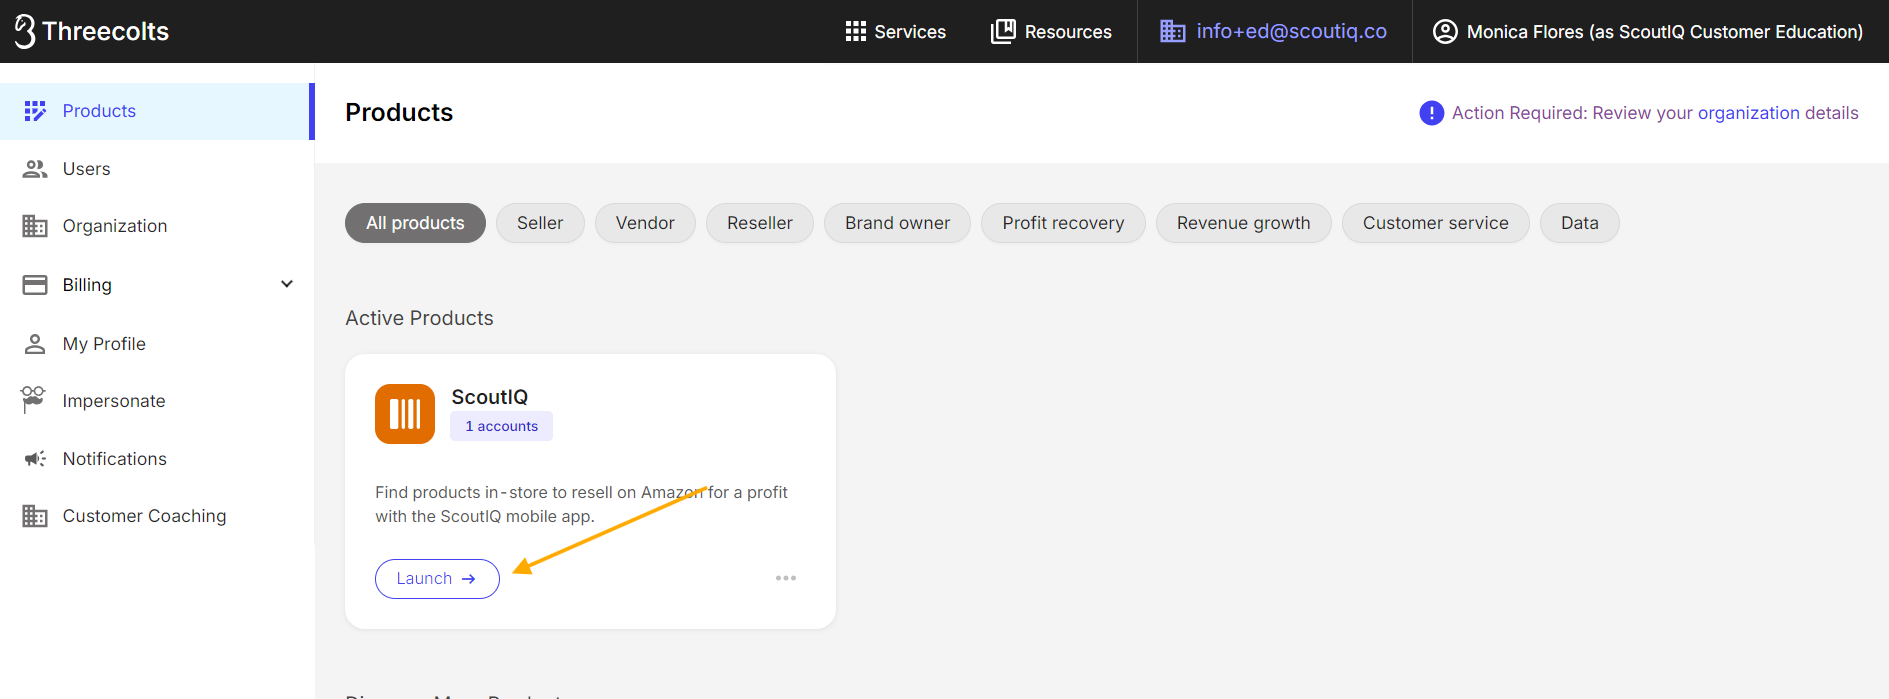
12. We are almost done! Now, launch your ScoutIQ account from the Threecolts Product Page by pressing Launch, so that you can set your newly added user’s permissions:
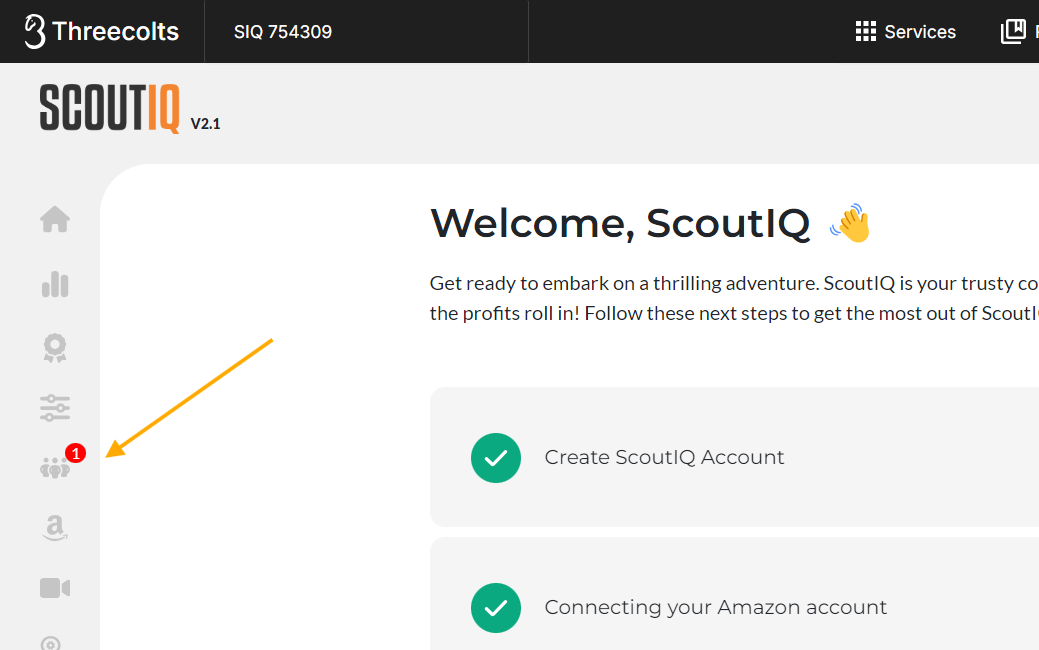
13. From the menu on the left, select the icon that looks like a group of people, Teams will appear when you hover over this area. You should also see a Red #, indicating that action is required:
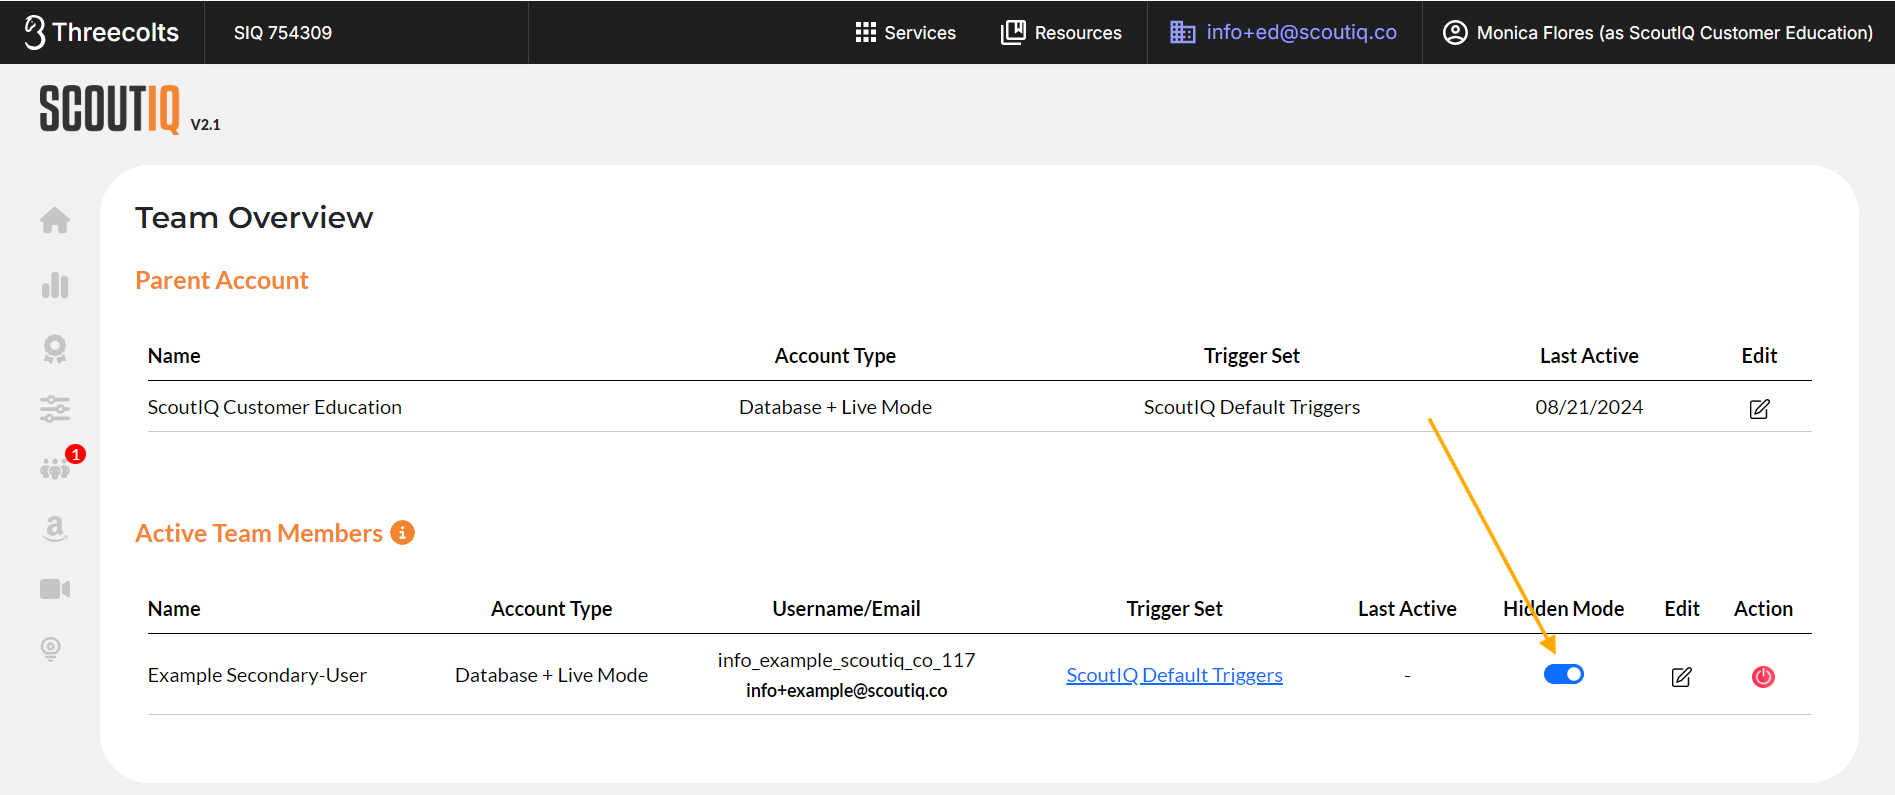
14. You can toggle Hidden Mode for your secondary user ON or OFF on this screen. Important Note: By default your secondary user will be in Hidden Mode.
Hidden Mode limits the information your secondary user will have access to. Rather than the scout screens you see, your team member's account will show only a large Green check mark for each ACCEPT or a large Red X REJECT. This level of access is ideal for paid scouts, who will not be sharing in your profits directly, as it prevents them from seeing the profitability of each book. Leave your secondary user in Hidden Mode if you do not want your team member to analyze purchases.
However, if the secondary user is a business partner, spouse, or someone you would like to be able to make more complex purchasing decisions by evaluating the information presented on the scout screen, as you do, you may want to choose to toggle this off.
You can also assign Triggers to your team member from this screen.
Tip: Changes to Hidden Mode are automatic, your secondary user does not need to log out of the app for them to take effect.
Now your team member is ready to head out on a scouting adventure! They simply need to download the ScoutIQ app on their phone from the App or Play Store and log in with the email address and password they created in Step 8.
Tip: If they ever forget this password and need to reset it, they can use the same Forgot Password link you use, at manager.threecolts.com.
If you have any questions or issues please email support@scoutiq.co, we are here to help!